Choosing a Pump
We have two pumps to choose from, namely: the Bellows Foot Pump and the Double Action Hand Pump with Gauge.
Pumps, valves, adapters, gauges … it can all be a bit confusing.
Don’t worry, on this page, you can find out everything you need to know to successfully inflate your Advanced Elements inflatable kayak.
We have two pumps to choose from, namely: the Bellows Foot Pump and the Double Action Hand Pump with Gauge.
The first key feature to consider is the maximum pressure they can achieve.
The Double Action Hand Pump with Gauge maxes out at 10 PSI and this is great for the Drop-Stitch Floor and our kayaks that include drop-stitch:
Another feature to consider is how compact the pump is.
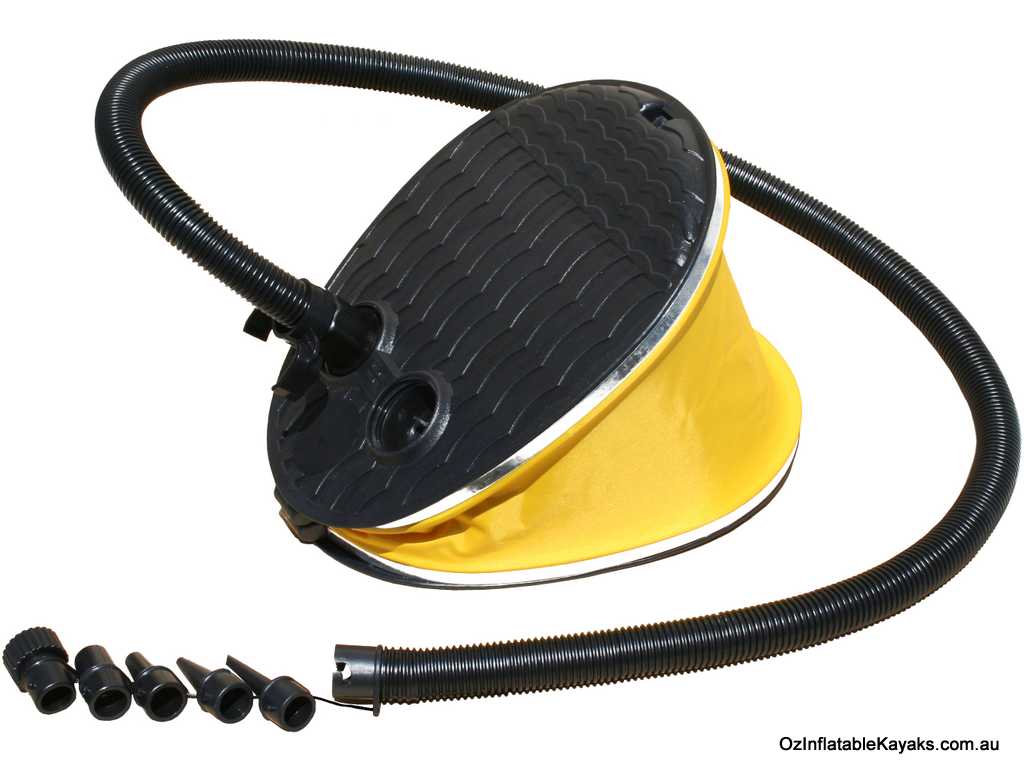
The Bellows Foot Pump actually folds flat and clips together. So you’ve got a pump that in the end is about the size of a dinner plate with about a 5cm depth. So it’s a nice compact option for people that want to get everything back in the bag, or have a limited storage space, or are traveling for example.
The Double Action Hand Pump is what it is. You can’t make it any smaller. It’s a bigger beast.
FYI, ‘Double Action’ simply means it inflates both on the upstroke and on the down stroke.
Another key feature is the pressure gauge.
The Double Action Hand Pump with Gauge has the pressure gauge sitting on top, included.
The Bellows Foot Pump does not come with a pressure gauge. This is not a huge deal, because the Bellows foot pump has a maximum pressure of 2.5 PSI, so you are likely to break the pump before you’ll break the kayak!
One of the most important factors to consider when choosing a pump is the action required.
I love the Bellows Foot Pump because you get to stand upright and just use your leg to pump up and down. I find it easier for the body.
With the Double Action Hand Pump with Gauge you’ve got to get both hands, both feet and your back and legs all involved in the action. So although it goes quicker, it’s a slightly more intense workout.
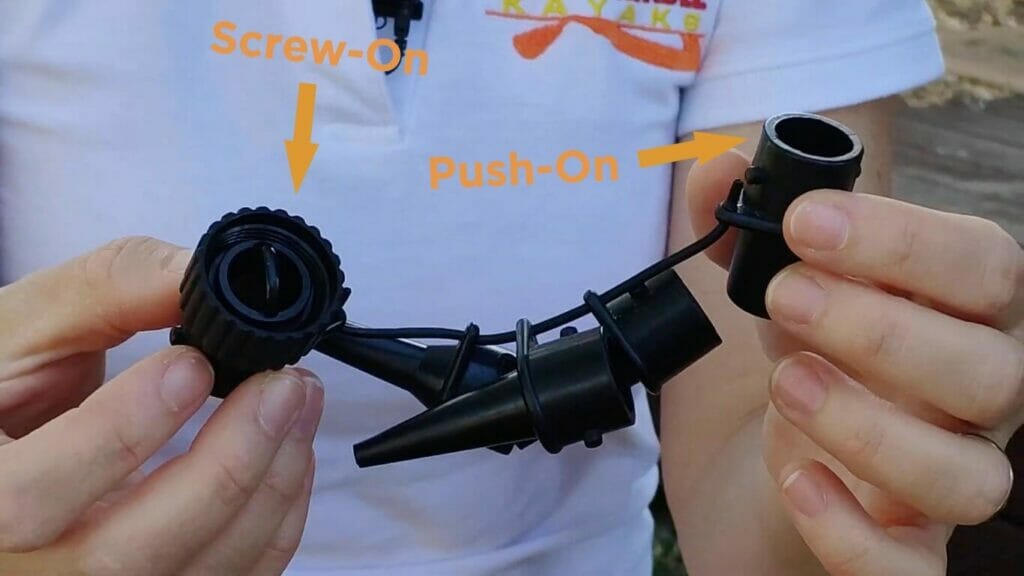
There are several different valves on the Advanced Elements kayaks and they use a variety of adaptors.
Confused? This section will clarify what you need to get paddling!
When you order a hand or foot pump from Advanced Elements, it will come with an attachment of valve adaptors.
Two of them are used for the kayaks – the screw on adapter and the push on adaptor.
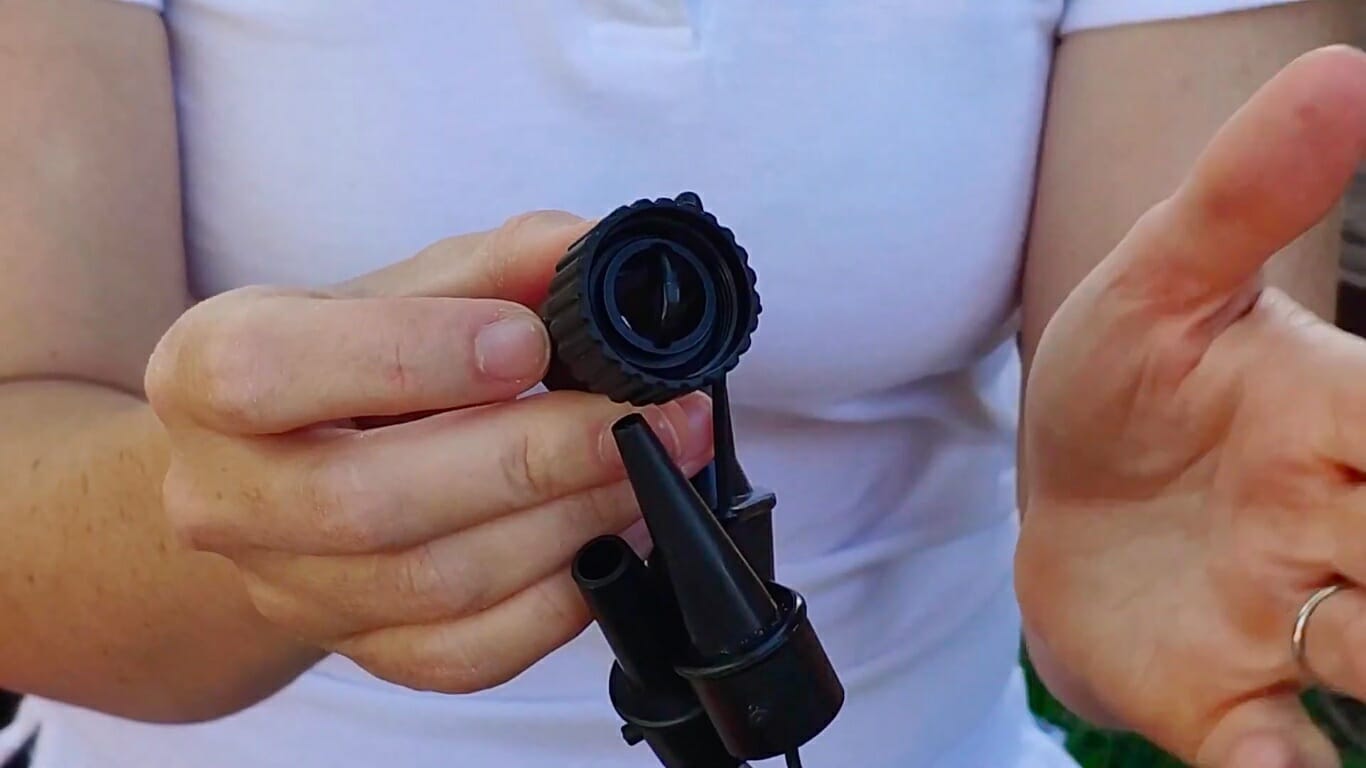
The first one is called Screw-On Valve Adaptor because you screw it on and this is for use with what we call the Spring Valves.
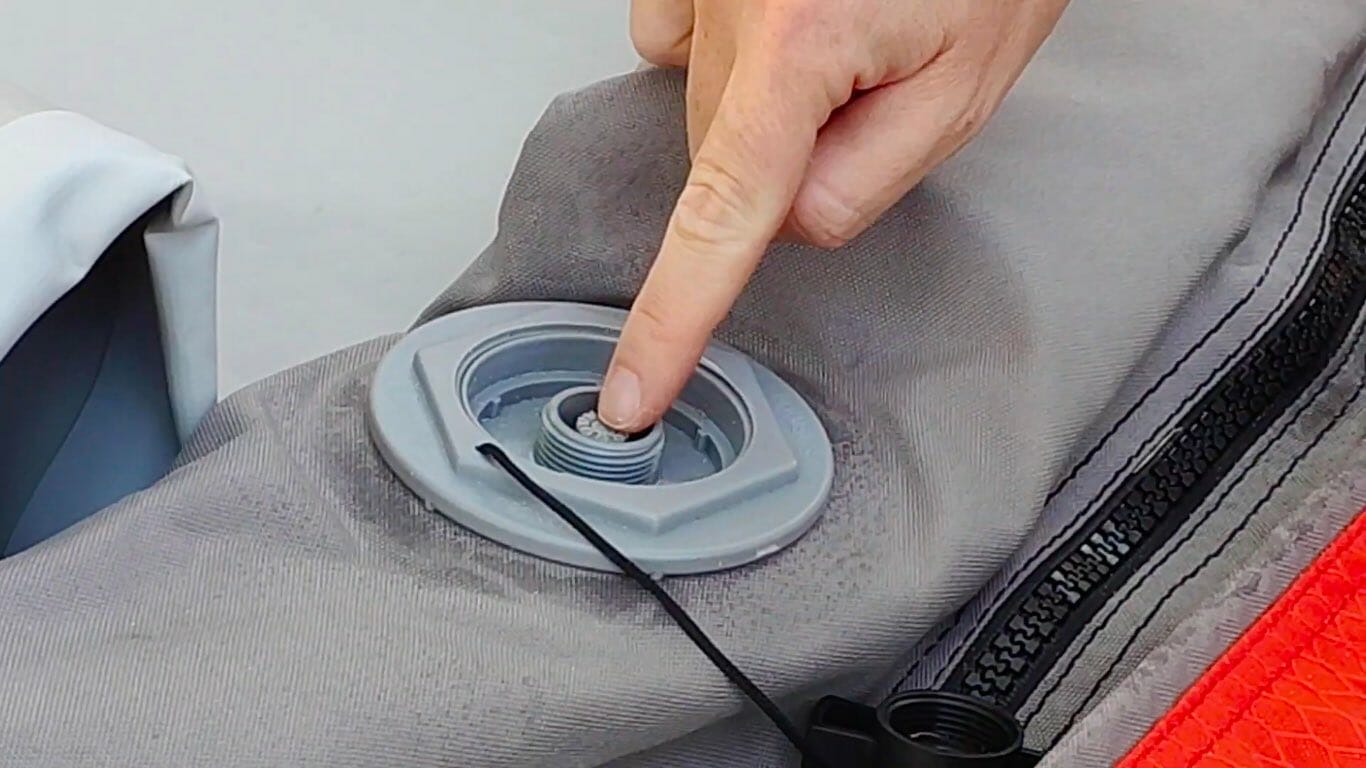
Spring valves have a little spring inside and it allows you to push and turn so the inside bit pops up for inflate (where it only lets air in) and then you can push and turn so the inside bit stays down for deflate (where it only lets air out).
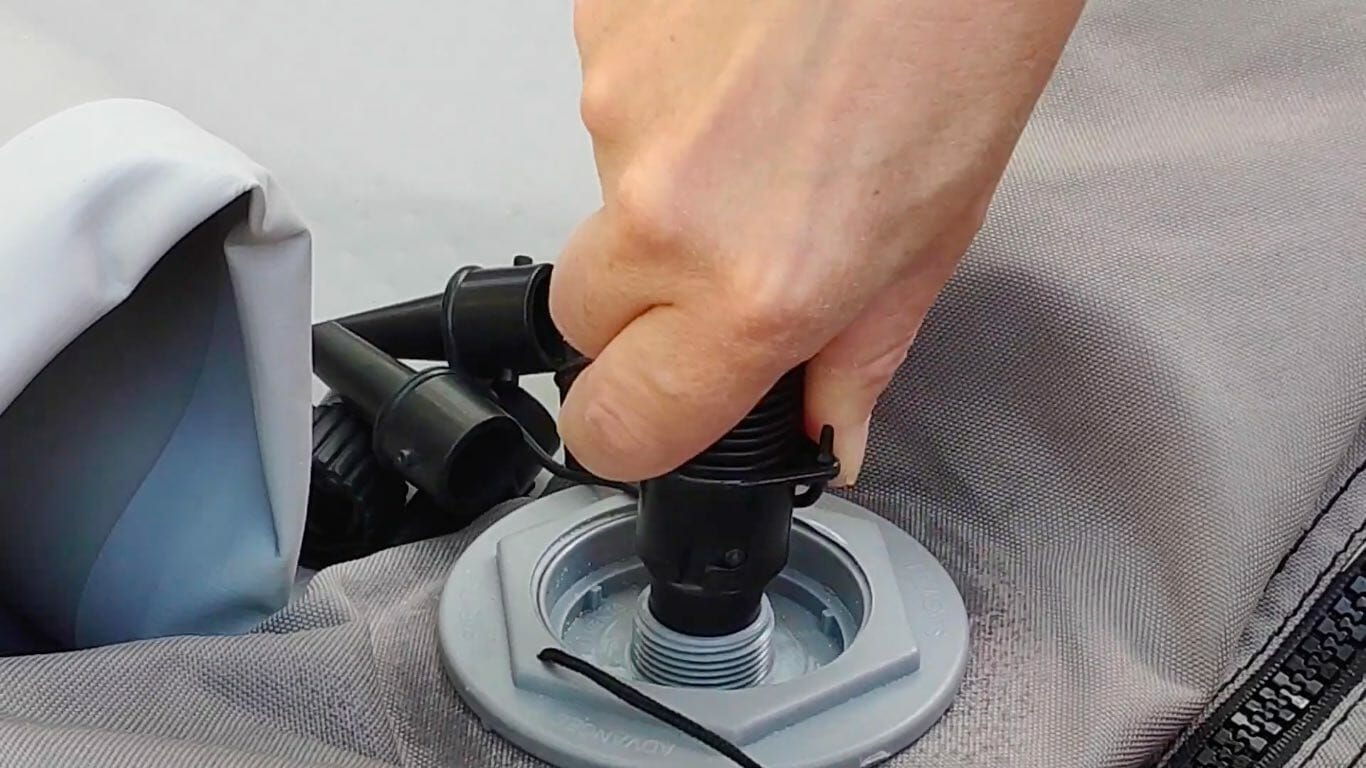
At the end of the pump hose, there’s a little bayonet style fitting. You push and turn to get that Screw-On Spring Valve Adaptor attached to the end of the pump hose. Then you can screw it on to the Spring Valve till it’s nice and secure.
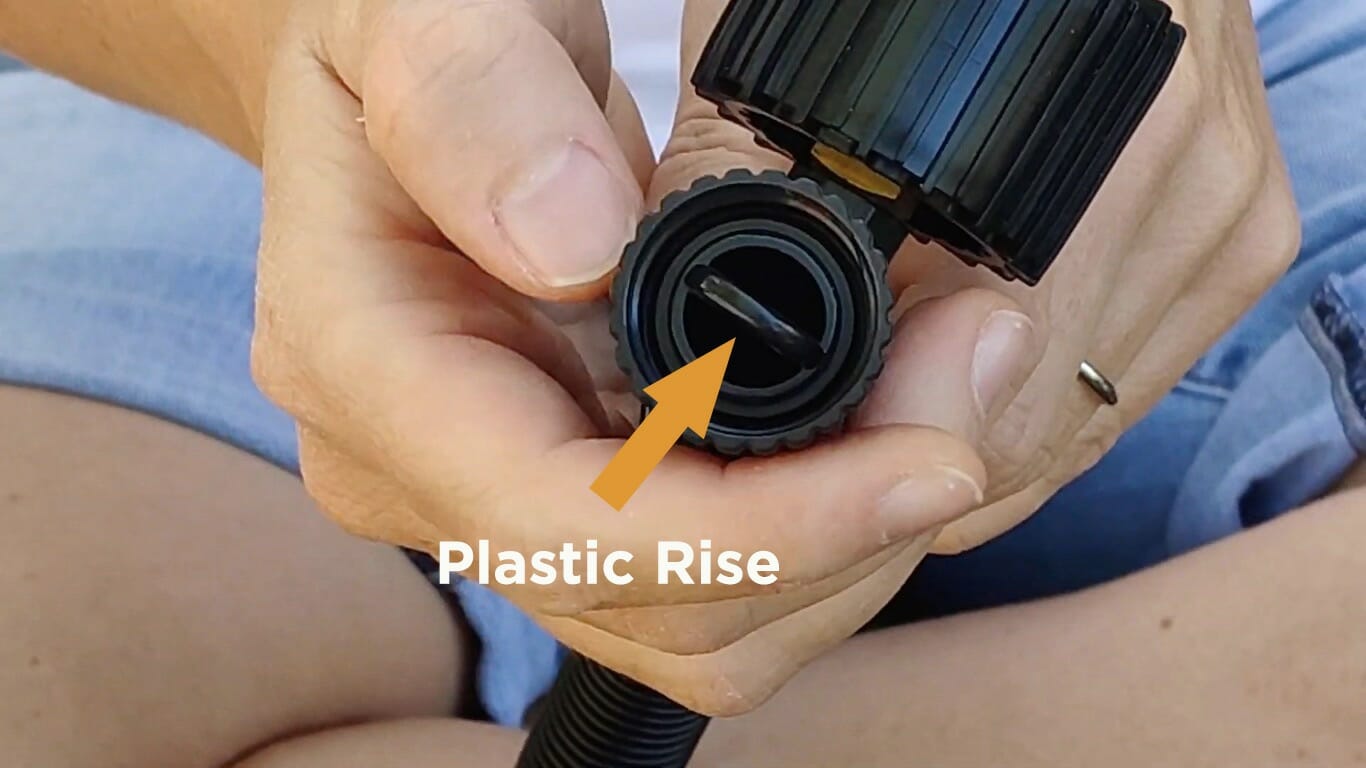
If you look at the inside of the Screw-On Spring Valve Adaptor, it’s got a little plastic rise in there and what that does is push the valve back down halfway. This allows some air to be coming back up through the tube for the pressure gauge to work.
Don’t be alarmed if at first you think your pressure gauge is not working. The pressure gauge typically doesn’t start working till about 1 to 1.5 PSI. So you need to have the kayak fairly firm before you get a pressure reading.
NOTE – you need to use the Screw-On Spring Valve Adaptor to get a pressure reading, not the push-on adaptor.
When it comes to the twist valves, they literally twist open and twist to close.
These tend to be used for low pressure chambers, for example, the Inflatable Lumbar Seat, the Inflatable Foot Brace and for the soft floor that comes in a lot of the AdvancedFrame models.
NOTE – None of these are high pressure chambers, so you will NOT get a back pressure reading, even if you are using a gauge. There’s not enough pressure for the pressure gauge to work. So you just go by feel – once it gets to full of air but still soft, you’re done.
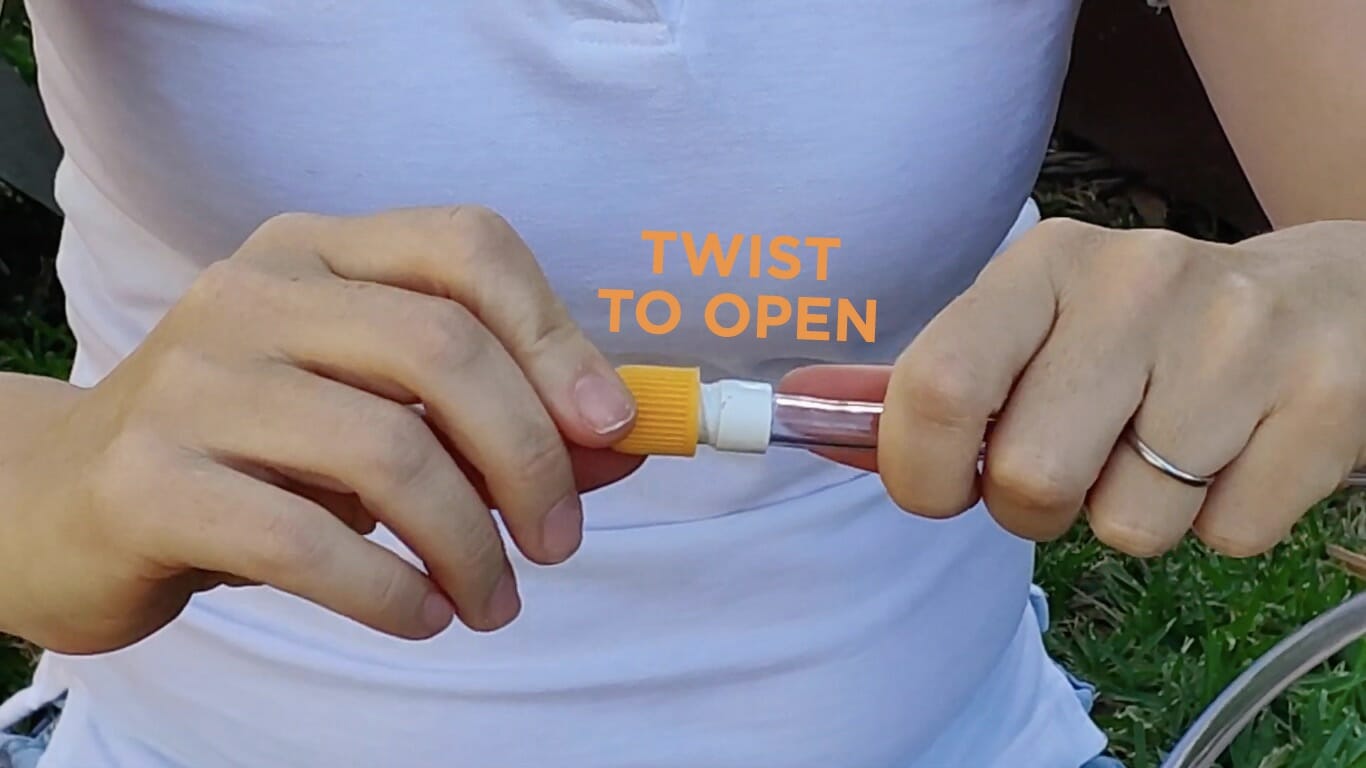
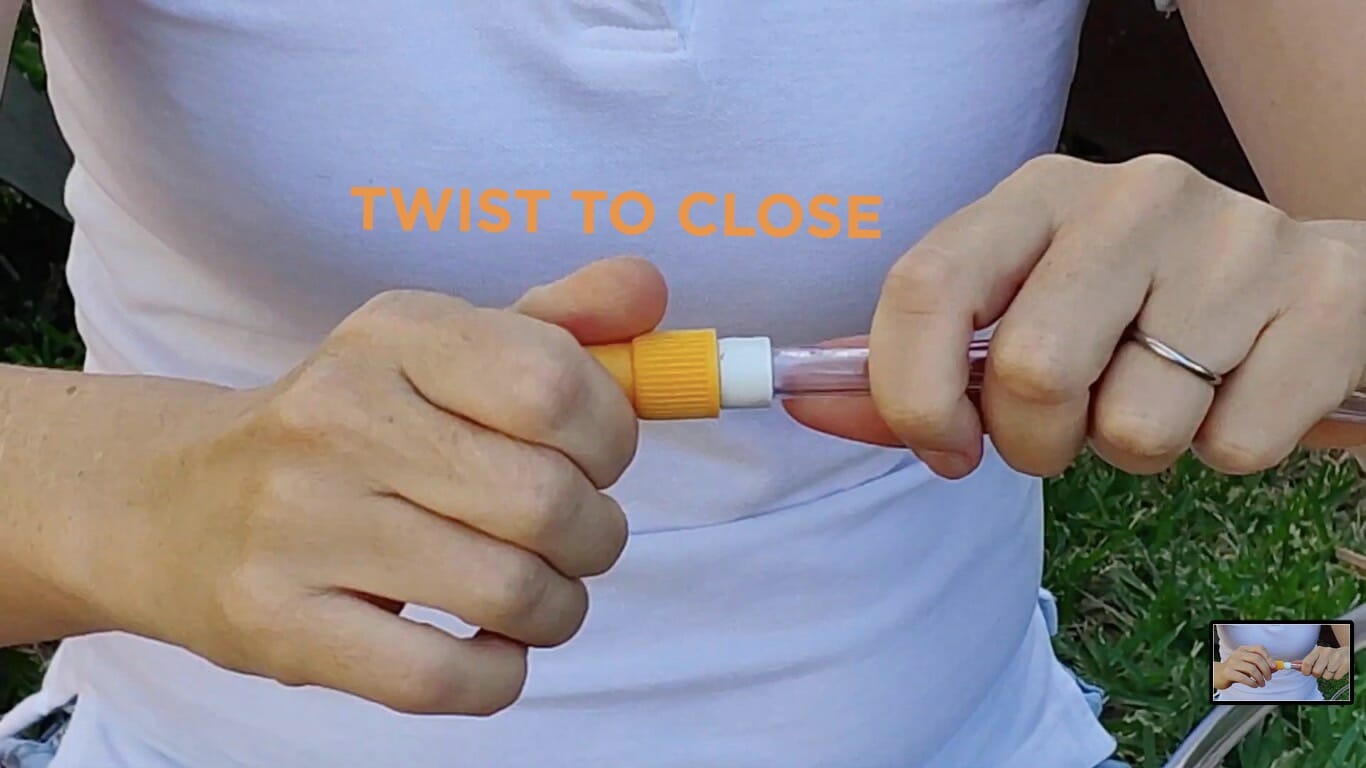
What we use for the twist valves is the Push-On Valve Adaptor (called that because you push it on to the valve).
It’s about 1cm in diameter and it’s very common on hand and foot pumps.
You use the push-on valve adaptor on the twist valves by pushing it on.
You pump away (remember you’re not going to get a back pressure reading), then you twist the valve closed and pull the hose off and the air stays in.
The great thing about the Push-On Valve Adaptor is you can actually use it on the spring valves.
So if you can’t find your Screw-On Valve Adaptor this is a great substitute and I use this a lot myself because it’s quicker and you don’t have to screw it on. You literally push it on and it’s on.
The thing to remember though is you’re not going to get a back pressure reading by using the push-on adaptor with the spring valve, because the valve is set to inflate. If you move the pump up and down slowly, you’re going to get an idea of the pressure because when you’re pushing the air in there is some back pressure going up the pump hose and the pressure gauge need will swing a bit.
But if you’ve been blowing up your kayak for a good while now, you get a good feel for what 2 PSI or 2.2 PSI feels like, so you generally are less reliant on the pressure gauge and you can save a bit of time by using that Push-On Valve Adaptor.
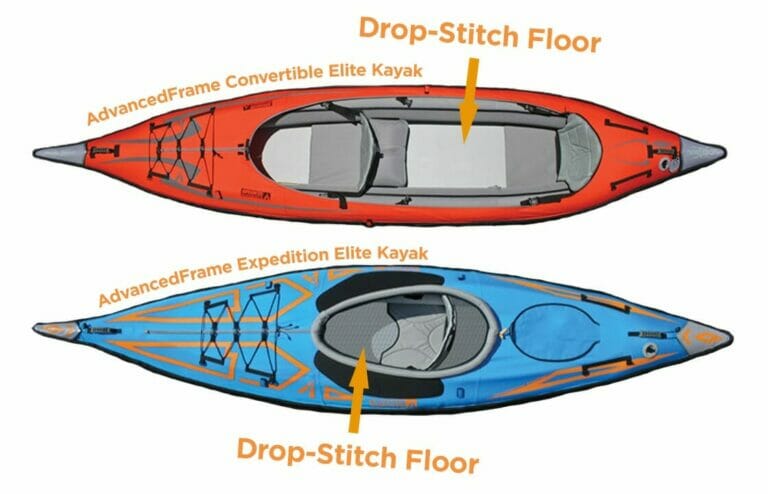
If you bought one of our Elite models: the AdvancedFrame Convertible Elite or the AdvancedFrame Expedition Elite for example, you’re going to have a Drop-Stitch Floor with that model and sometimes people buy the Drop-Stitch Floor as an accessory for the regular AdvancedFrame or the AdvancedFrame Sport.
The Drop-Stitch Floor uses a different valve again, because it’s a very high pressure chamber.
It’s called a HR Valve (Halkey-Roberts Valve) and it is similar to the spring valve. You push and turn to pop the middle bit up for inflate. Push and turn again to pop the middle bit down for deflate.
You need to use the HR adaptor for the HR valve – the place you find it is in the pocket behind your kayak seat. Don’t lose it! Always put it back in your pocket behind your seat.
This one’s a bit different – instead of screwing or pushing it on you push and turn until it locks tight, and then you go ahead and pump up the Drop-Stitch Floor.
The important thing to note about this particular valve is that similar to the Screw-On Adaptor, it depresses the HR Valve a bit to allow back pressure reading. So you will get a pressure reading after about 1.5 PSI but when you untwist the valve adaptor you’ll hear a little “psht”. A bit like when you unscrew after pumping up your bicycle and that’s a little bit of air escaping as the valve pops back up into the inflate position. So you just need to accommodate a tiny bit of extra pressure to allow for that.
With all of the valves, you put the cap on just for safety and when you’re finished take that HR adaptor off and pop it behind the seat pocket.
If you have an inflatable stand-up paddleboard you might have a pump that looks like this with HR Valve Adaptor on the end. You can use this for the Drop-Stitch Floor or any Drop-Stitch Chamber but unless you can take the end off and put our Inline Valve Adaptor on you won’t be able to use it for the Twist Valves or the Spring Valves. So you’ll have to get a new pump and for anything with Drop-Stitch or anything high-pressure the Double Action Hand Pump with Gauge is your best option.
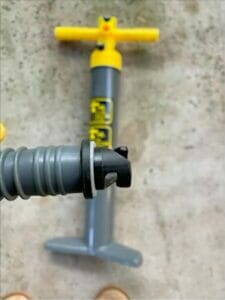
If you bought the Bellows Foot Pump instead of a Double Action Hand Pump with Gauge it comes with the same swag of valve adaptors. You’ve got your Screw-On and you’ve got your Push-On but what it does not come with is a pressure gauge.
When you first get your kayak, having a pressure gauge is really important because if you under inflate your kayak, it’s not going to perform that well on the water and if you over-inflate it you can risk damage.
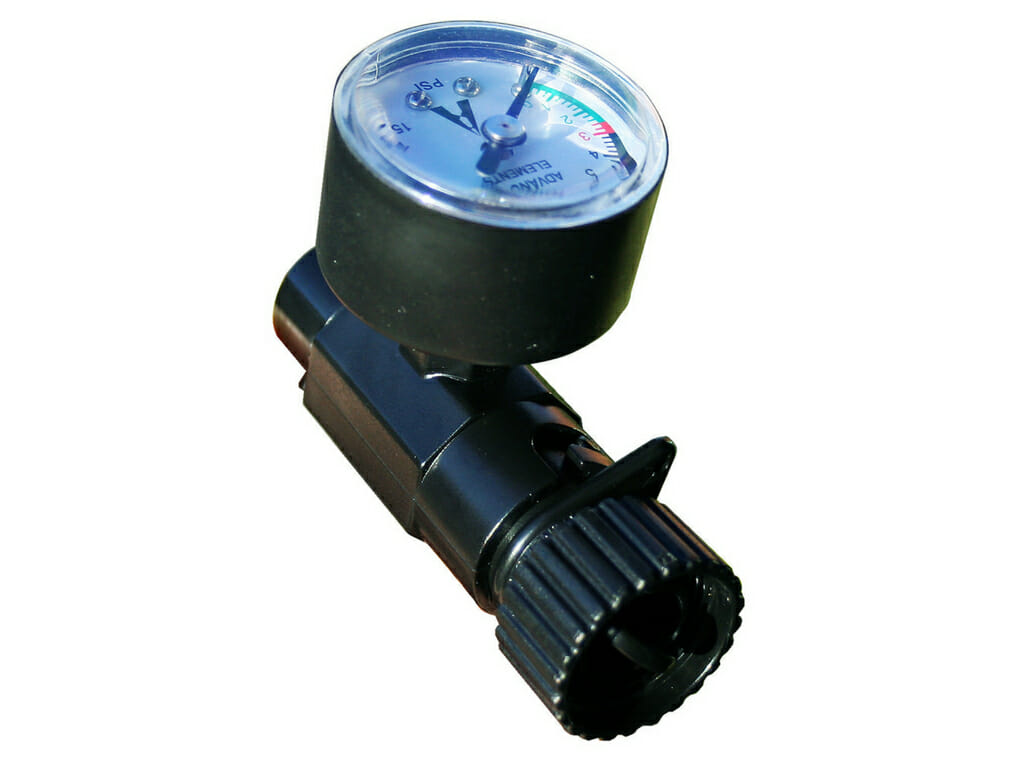
I very strongly recommend anyone who buys a foot pump also gets our Inline Valve Adapter with High Pressure Gauge.
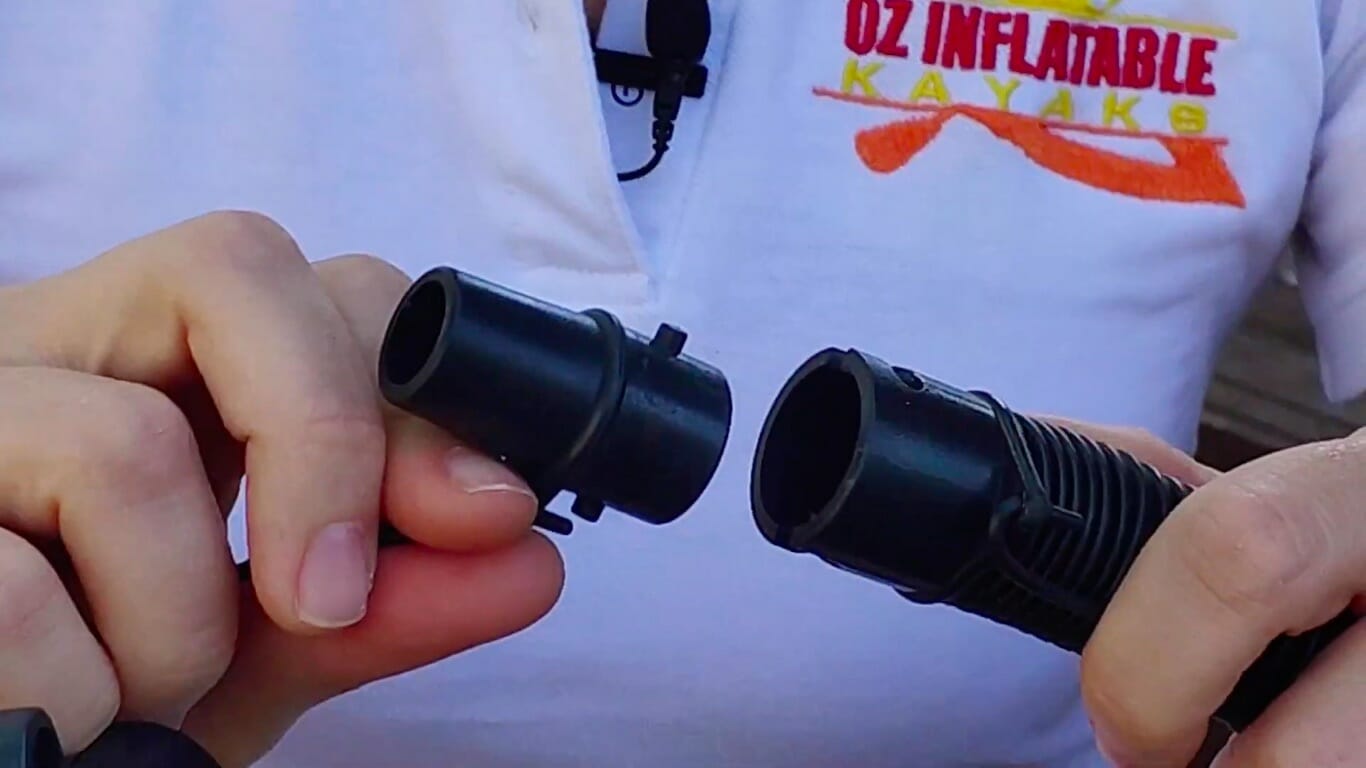
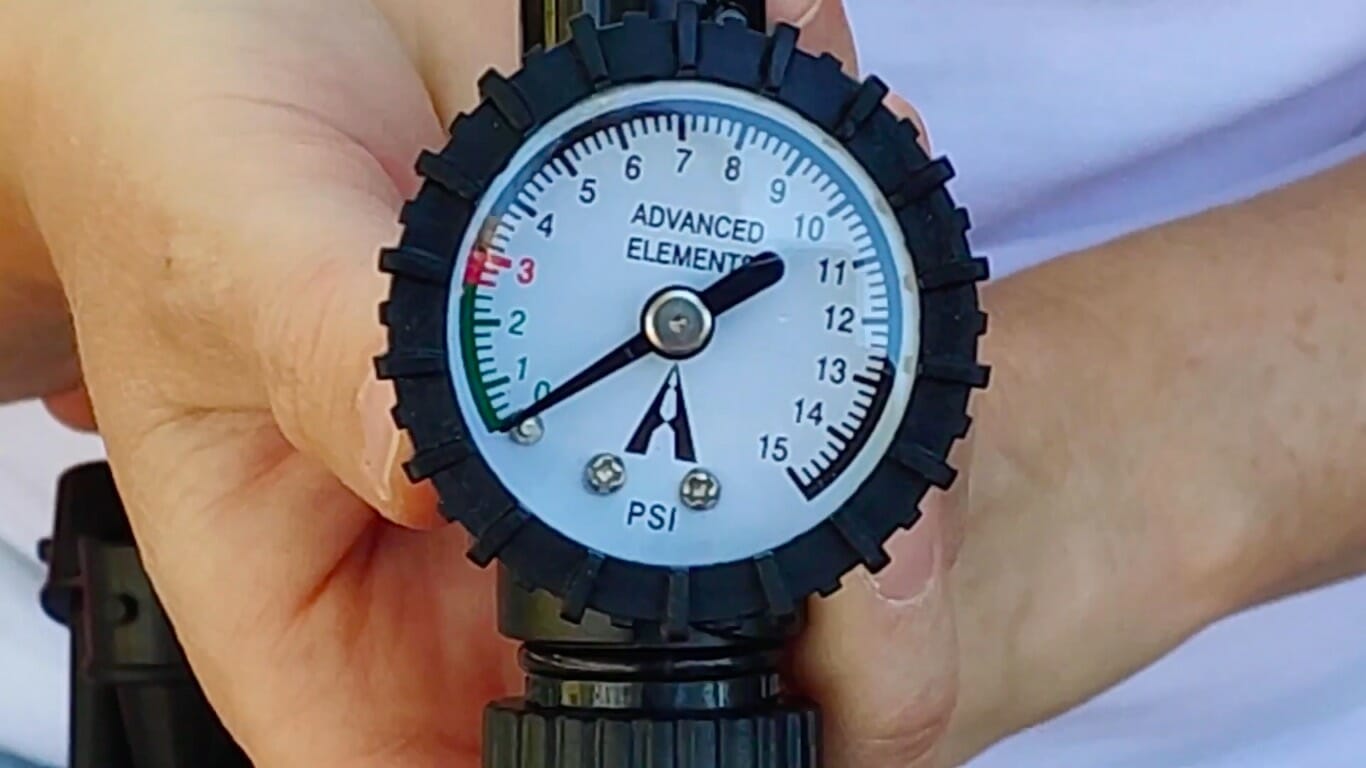
This product is essentially a pressure gauge. So this is the pressure gauge component:
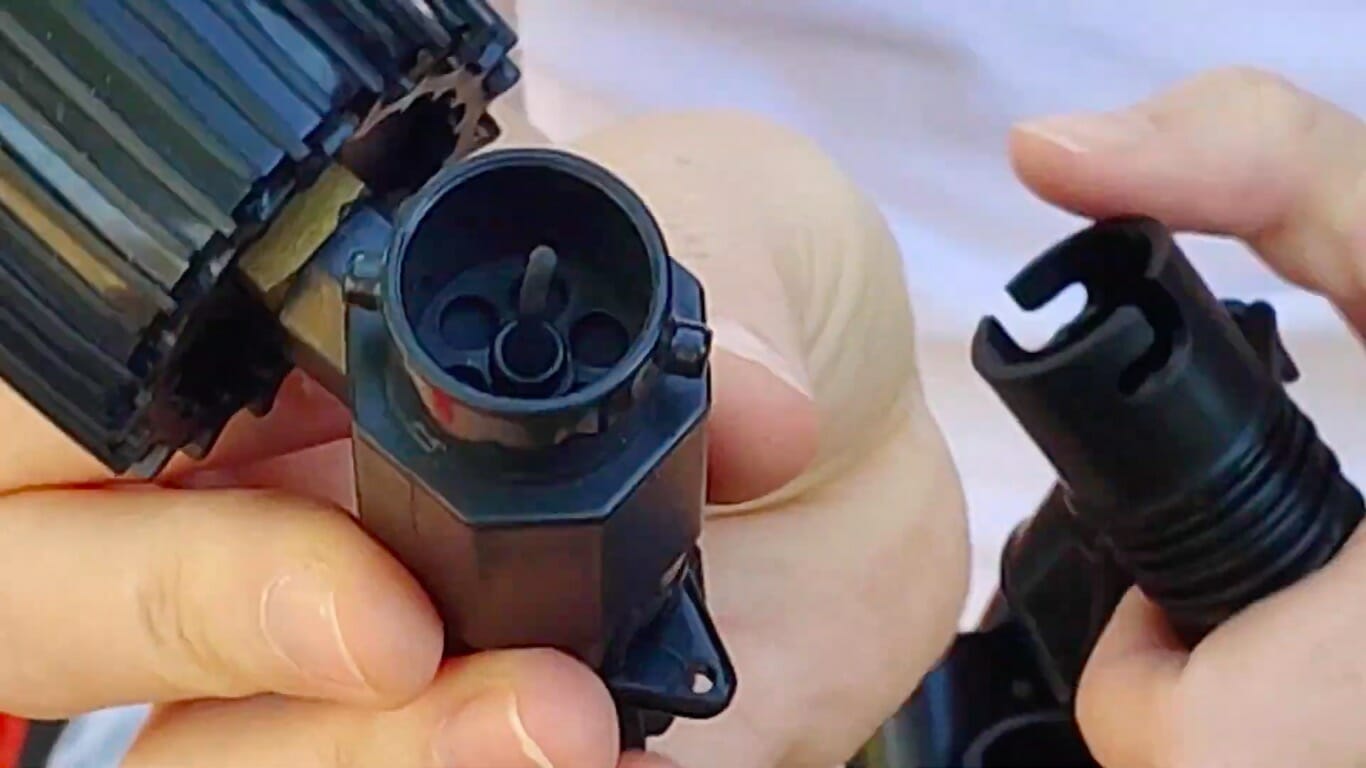
And then this is the bayonet fitting:
The Inline Valve Adaptor goes into the end of the pump hose and then the Screw-On Valve Adaptor can be screwed onto the kayak and you get a back pressure reading just like you would with the hand pump.
Note though the Screw-On Adaptor is removable. So you can take that off and put a Push-On Valve Adaptor for your twist valves if you want but just remember that you’re not going to get enough pressure in those chambers with the twist valve to actually get a back pressure reading.
It is important not to over inflate your kayak because it could cause damage, but it is equally important not to under inflate your kayak, because it won’t perform well on the water.
Your kayak should be quite firm to touch, and it should be rigid when you pick it up at either end.
The best way to be sure you have the right pressure is to use a pressure gauge. The Double Action Hand Pump With Gauge has a built in pressure gauge, OR you can get the Inline Valve Adaptor with Gauge for use with any pump.
What we generally look for is something like a Double Action Hand Pump with Gauge or a Bellows Foot Pump works really well.
If you’ve got a high pressure chamber such as a drop-stitch chamber with an HR Valve, the bayonet fitting will also work with the HR Valve Adaptor that comes with your kayak or with your Drop-Stitch Floor.
If you have an inflatable stand-up paddle board, you might have a pump that looks like this with HR Valve Adaptor on the end. You can use this for the Drop-Stitch Floor or any Drop-Stitch Chamber but unless you can take the end off and put our Inline Valve Adaptor on, you won’t be able to use it for the Twist Valves or the Spring Valve.
So you’ll have to get a new pump. And for anything with drop-stitch or anything high pressure, the Double Action Hand Pump with Gauge is your best option.
The last type of adaptor you need is a Push-On Adaptor and the Push-On Adaptors are good for the Twist Valve. As long as you have a bayonet style connection on the end of your pump hose, you will be able to use the push-on adaptor, but most hand and foot pumps come with a compatible push-on adapter so this isn’t usually a problem.
Twist Valves tend to be in the low-pressure chambers like the deck lifts, the soft floor, any sort of thwarts they’re in the Lumbar Seat.
You can also use the Push-On Valve Adaptor on the Spring Valves on your kayak for quick inflation, but bear in mind you won’t get a back pressure reading when you use the Push-On Adaptor.
It is not powerful enough. The 12v pump is a great way to get the kayak started, but for full inflation a bellows foot pump or double-action hand pump is necessary.
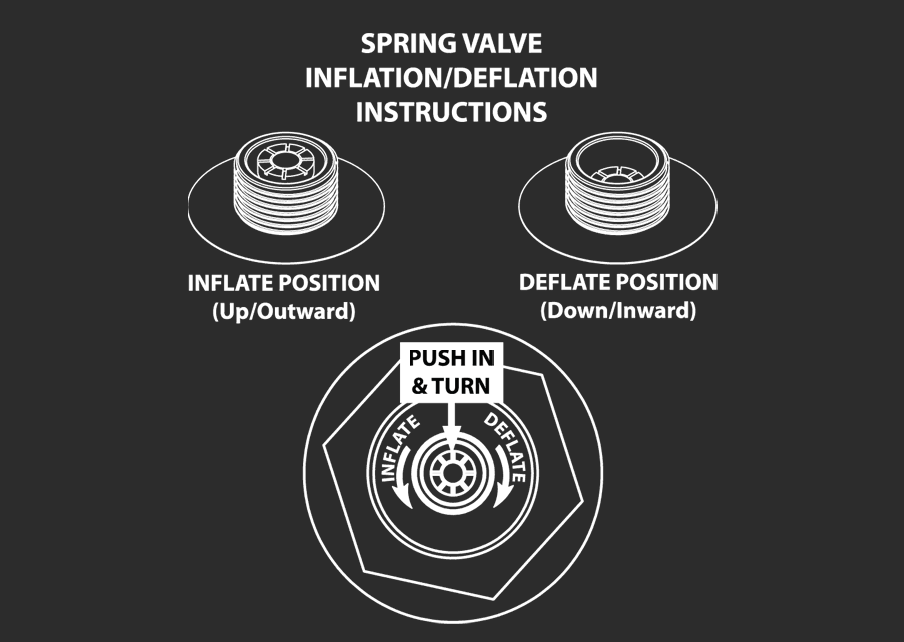
Your valve is in the deflate position when the plunger is pushed in. Push the plunger with your finger and twist until it pops up. Refer to your manual for proper inflation and deflation techniques.
Yes! All of our kayaks comes with a FREE pump.
You can see more of our pumpṡ here.
There are a few electric pump options for your Advanced Elements inflatable kayak.
They vary by speed of inflation, adapters included (and compatible with), size, weight, power options and price.
* some remote areas excluded